Monday, October 20, 2008

Post Production Workflow / Damage Control

Below is the latest post production workflow for the project. It also serves as a bit of a guide as to where we are at. Unfortunately we're at a point where we are approaching submission and are not in a good position to deliver the whole thing.

As a result we are looking to cut down the amount we deliver and just complete the first 6 scenes, which is pretty much the first act. This will give us something more realistic to work towards and reduce the risks of nervous/mental breakdown. This will still amount to about 5 minutes of animation and will still be a challenge.

So how did it come to this? Well despite careful planning throughout the year and regular reviews of our progress it just comes down to it being too much work for 1 animator, 1 producer and 1 sound guy. Because despite something looking good on paper, it didn't play out that way in real life. Freelance work commitments cropping up, software errors and glitches causing back tracking, the need for revisions and sleep to name a few things. Basically there wasn't enough time given to things going wrong, which was inevitable.

What started out as a little snowball gradually grew into one of considerable size that has finally caught up to us.

Another reason we decided to continue with the project despite its length was our belief in the story. Unfortunately my pre-production side was not very sympathetic to my production side. At the beginning of the year the focus was purely on the story, and while planning was done for production, in retrospect it was a little optimistic. And while I'm not making excuses, the course is centered around film so while concerns were raised about the length they were not enforced.

As a point of comparison a prominent animation school in France for its last year has a major project of creating a short animation. Most of the projects run between 2-3 minutes and have groups of 5-6 students trained in all areas of animation. Projects can be seen at the Gobelins Animation page.

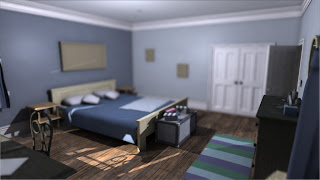
Interior Renders

Thought I'd just chuck up a render of each of the rooms of the house!


Monday, October 13, 2008

Keeping things moving

I'm currently having to juggle a few things for the project, today we re-recorded some lines with Amy, just because earlier we had some technical issues. I'm animating the scenes! which is good, they're starting out as being blocked out and then slowly getting polished over time. Then finally I'm getting the shaders/textures onto the sets and trying to get a nice colour scheme happening.

Below is a render of outside the house that took about 10 minutes to render. Luckily a lot of the shots in the animation are static so backgrounds can be separated from the action and rendered once as just 1 frame.

Tuesday, October 7, 2008

Wardrobe

Below are some renders of the characters clothes. In this animation i'm going to be using a feature within Maya called nCloth. It basically allows me to turn 3d meshes into cloth objects and have them drape over the characters.

Because the clothes have to be simulated over the characters they won't be added until the end when the animation has been done. It's then a matter of "caching" the simulation so I can render!

I've also included some of the sketches that came from research into different types of clothes. I wanted the clothes to reflect a bit of nostalgic quality, what I mean but this is as if they're from the early 90's / before now :P


Saturday, October 4, 2008

Title Sequence Animatic + Mood Board

Here's the title sequence animatic that I recently completed for James' class. It builds on the concept that was explored earlier in a mood board.

The concept is basically that a cicada is coming to the ground after burrowing for its growth period and the title sequence tracks up the burrow to reveal the cicada and the house from the film. Titles are overlaid with childish illustrations introducing the actors and giving some hints about the story. I've kept the title sequence quite slow to help establish the tone of the piece.

- kudos to Pete G for the sound fx!


Intro Animatic from Pete on Vimeo.


Saturday, September 13, 2008

More Rigging

Below are the rigs for the Cicada and Myna bird. I've included a side by side pic with the viewport in maya to give an idea of how the controls are set up. These guys were a lot easier to rig as they have simpler movement, unlike the characters which require full facial rigging.


Friday, September 12, 2008

Rigging & Weighting

Possibly the most tedious and arduous exercise in 3D, rigging is the process of making it possible for your character to move. It involves giving your character bones and then hooking them up to a system of controls so you can easily animate the character.

Luckily I was helped by a few plug-ins for Maya that enabled me to rig my characters in several days, rather than several weeks. I've included some quick renders below showing off their facial capabilities.